You have a beautiful logo. It is crisp, colorful, and represents everything your brand stands for. Now you want to stitch it onto company polos, caps, or tote bags. You imagine your team looking sharp and professional. But when you get the first sample back, your heart sinks. The text is crooked. The edges are jagged. The colors look muddy. What went wrong? You skipped the most important step.
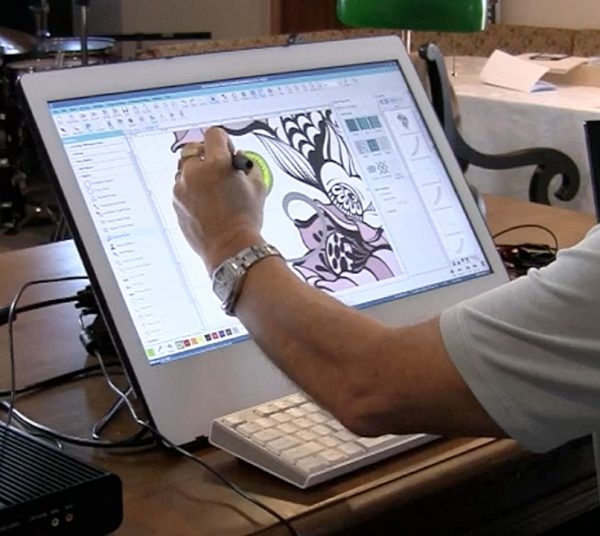
A logo does not magically become perfect embroidery just because you send it to a machine. There is an art and science behind making that happen. That art is called Custom Logo Embroidery Digitizing. It is the process of taking your flat, pixel-based artwork and translating it into a language of stitches that an embroidery machine can understand and execute beautifully.
Today, I am pulling back the curtain on this mysterious process. I want you to understand exactly what happens behind the scenes to turn your logo from a simple image into a stitched masterpiece. No confusing jargon, just real talk. Let us dive in.
What Exactly is Embroidery Digitizing Anyway?
Let us clear up the biggest misconception first. Embroidery digitizing is not scanning. It is not tracing. It is more like translating a poem from one language to another, while keeping the rhyme and rhythm intact. Your logo lives in a world of pixels. Pixels are tiny squares of color that make up a digital image. They look great on a screen.
But an embroidery machine does not see pixels. It sees needles, thread, and fabric. It needs step-by-step instructions on where to place each stitch, how long that stitch should be, what direction it should go, and when to change colors. Digitizing is the process of creating those instructions . It transforms your artwork into a digital stitch file that guides the needle to recreate your design on fabric .
Without this translation, your machine is like a lost tourist in a foreign country. It has no map, no guide, and no idea what to do. That is why you get messy results when you try to embroider a raw JPG file.
The Secret Art of Professional Digitizing
If you have ever tried the "auto-digitize" button on cheap software, you know the results are often terrible. That is because professional digitizing is not a push-button process. It is a craft that requires skill, experience, and a deep understanding of how thread behaves on different fabrics.
Let me walk you through what a professional digitizer actually does.
Step 1: Analyzing Your Artwork
The process starts long before any stitches are placed. A digitizer carefully studies your logo. They look at every curve, every line, every color transition. They identify the smallest text and the tiniest details. They ask questions. What fabric will this logo go on? How large should the final design be? Where on the garment will it sit? All of these factors influence the digitizing strategy .
Step 2: Choosing the Right Stitch Types
Not all stitches are created equal. A professional digitizer selects the perfect stitch type for each element of your logo. Thin borders and lettering usually get a satin stitch . This creates a smooth, slightly raised, and shiny edge that looks polished and professional. Larger filled areas get a fill stitch, also known as a tatami stitch . This creates a flat, woven texture that covers the fabric evenly and completely .
Step 3: Mapping Stitch Directions
This is where the magic happens. The digitizer chooses the direction of the stitches for every single element. Why does this matter? Because thread reflects light. Stitches going in one direction will catch the light differently than stitches going another direction . A pro maps the stitch angles to enhance the shape and depth of your logo. For example, a circular logo might have stitches radiating outward from the center to create a dimensional, dynamic look .
Step 4: Adding a Hidden Foundation
This is one of the most important secrets of professional embroidery. It is called underlay stitching . These are a series of stitches that are placed down first, before the visible top stitches. Think of them like the foundation of a house. You cannot see them in the final product, but they stabilize the fabric, prevent puckering, and give your top stitches something solid to anchor into . Without proper underlay, your logo will look lumpy and distorted.
Step 5: Accounting for Pull Compensation
Here is a cool fact about thread: it is strong. As the needle pulls the thread through the fabric, it exerts tension. This tension actually pulls the fabric slightly inward. It is like a gentle tug-of-war happening under the needle. A skilled digitizer accounts for this by adding pull compensation. They slightly stretch the design in the opposite direction so it looks perfectly straight and proportionate when it is finished stitching .
The Dangers of Auto-Digitizing
Let me be brutally honest with you. Auto-digitizing is a trap. Software companies love to advertise it because it sounds so easy. "Just upload your image and click convert!" But the results are almost always disappointing.
Auto-digitizing cannot understand the nuances of your logo. It cannot distinguish between an important detail and background noise. It cannot choose the right stitch direction to enhance the design. It cannot add proper underlay or pull compensation. It just applies a generic algorithm and hopes for the best. The result? A lumpy, distorted, unprofessional mess that does not represent your brand.
I have seen business owners waste dozens of shirts and hundreds of dollars in wasted thread and stabilizer trying to make auto-digitized files work. Do not fall into that trap.
Why Professional Digitizing is Worth It
You might be thinking, "But professional digitizing costs money, right?" Yes, it does. But let us look at the real value you are getting.
First, a professional digitizer delivers a file that works the first time. You do not waste materials on test runs that fail. Second, the design looks sharp, clean, and exactly like your artwork. It represents your brand the way it deserves to be represented. Third, a professional file stitches efficiently. It minimizes thread trims and jumps, reducing production time and wear on your machine. Fourth, you get expert guidance. A good digitizer will advise you on the best fabric, thread colors, and design size for your logo.
Professional digitizing is an investment. But it is an investment that pays for itself in saved materials, time, and frustration. For a simple logo, prices often start around $10 to $15 . That is a small price to pay for perfection.
Conclusion
Embroidery digitizing is the essential bridge between your artwork and a beautiful stitched product. It is the process that takes your flat, pixel-based logo and gives it dimension, texture, and life. You cannot skip this step and expect professional results. Whether you choose to learn the craft yourself or, more wisely, hire a professional digitizer, the goal is the same: a logo that makes your brand shine.
The auto-digitize button is a tempting shortcut, but it rarely delivers. Professional digitizing is an investment that saves you time, money, and frustration. It ensures your logo looks sharp, stitches smoothly, and represents your brand with the quality it deserves. So, the next time you need custom embroidery, remember the translation. Your logo deserves to be understood.


