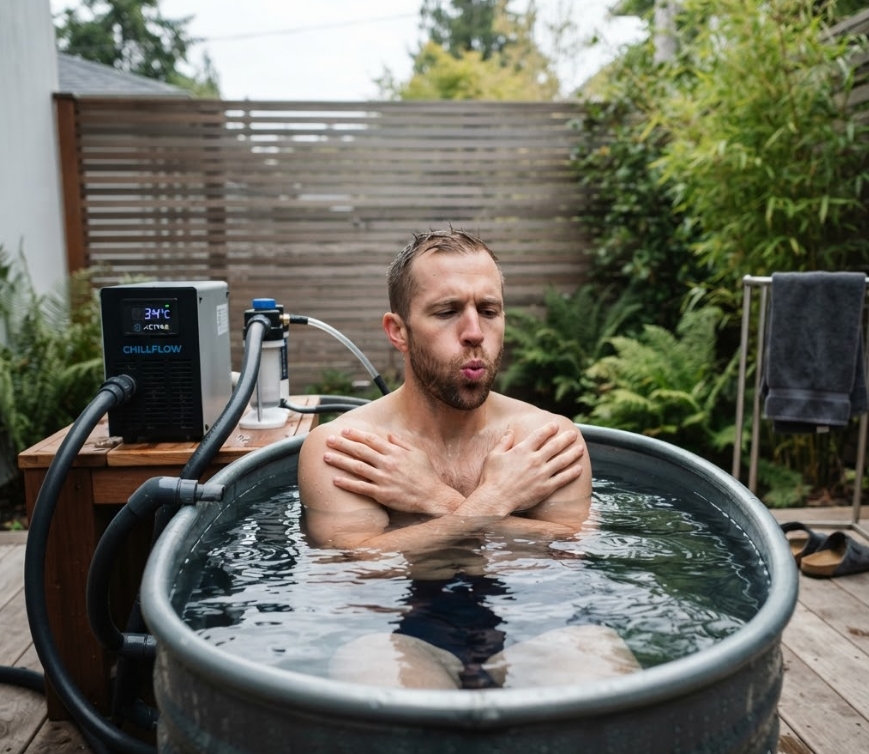
Building your own cold plunge tub is one of the most rewarding wellness projects a home DIYer can take on. It gives you full control over size, materials, and budget, and it lets you create a recovery ritual on your own schedule instead of driving to a studio. But there is a difference between a tub that gets cold once and a tub that stays reliably cold, day after day, session after session. That difference comes down to a handful of engineering decisions made before you ever step into the water.
This guide walks through what actually keeps a DIY build performing like a proper cold plunge tub over the long term, from insulation choices to chiller sizing to filtration habits. Whether you are building a simple backyard basin or something closer to a commercial cold plunge setup for a home gym, the same principles apply: control heat loss, size your cooling equipment correctly, and keep the water clean enough that it does not fight against you.
Why Consistency Is Harder Than It Looks
Most first-time builders assume that once they hit their target temperature, the tub will just stay there. In reality, cold water is constantly losing its "coldness" to the surrounding environment, and every gap in your build lets that heat sneak back in. Ambient air temperature, sunlight, body heat from each plunge, and even the material of the tub itself all pull the water back toward room temperature.
This is fundamentally a heat transfer problem. As Wikipedia's entry on thermal insulation explains, insulation works by reducing the transfer of thermal energy between objects that are in contact or within range of radiative influence, and that transfer can happen through conduction, convection, or radiation. A DIY cold plunge tub is essentially trying to fight all three of these mechanisms at once: conduction through the tub walls and floor, convection through any exposed water surface, and radiation from a warm garage or patio. If you do not address each pathway, your chiller will spend most of its energy just fighting heat gain rather than actually lowering the temperature.
This is also why interest in home cold plunge tubs has grown alongside a demand for more predictable, professional-grade results. As cold water immersion has moved from a niche athletic recovery tool into a mainstream wellness habit, manufacturers have responded with smarter temperature control, better filtration, and app-based monitoring, features that used to only exist in commercial cold plunge installations at gyms and recovery clinics. DIYers building at home are essentially trying to replicate that same reliability without the commercial price tag, which means the fundamentals matter even more.
Section 1: Insulation Is Your First Line of Defense
If there is one upgrade that makes the biggest difference in a DIY build, it is insulation. A bare stock tank or plywood tub with a liner will bleed cold water temperature quickly, forcing your chiller to run constantly and wearing down the compressor faster than it should.
A few practical steps go a long way here:
Wrap the exterior walls. Rigid foam board (typically two inches or more) or closed-cell spray foam applied to the outside of the tub shell will dramatically slow conductive heat gain. Aim for a continuous layer with no gaps at seams or corners, since even small thermal bridges will let heat sneak through.
Insulate the base. Many builders forget the floor of the tub, but ground contact is a major source of heat transfer, especially if the tub sits directly on concrete or soil. A foam pad or insulated platform underneath keeps the bottom from acting like a heat sink.
Cover it when not in use. An insulated lid does double duty: it blocks radiant heat gain from sunlight or overhead lighting, and it stops evaporative heat loss from the water surface, which is one of the fastest ways cold water warms up between sessions.
Mind the material of the tub itself. Stainless steel is durable and popular for its clean look, but it conducts heat far more efficiently than a properly insulated plastic or fiberglass shell. If you build in steel, plan for thicker exterior insulation to compensate.
Getting insulation right means your chiller is only fighting the heat load from actual use (the water displaced by your body, the ambient air during a session) rather than a constant, slow bleed through the walls.
Section 2: Sizing and Selecting Your Chiller System
Once your tub is properly sealed against heat gain, the next variable is the chiller itself. This is where a lot of DIY builds either overspend on equipment they don't need or underspend and end up frustrated with inconsistent temperatures.
A few things to think about:
Match chiller capacity to water volume. A chiller rated for a 40-gallon tub will struggle in a 100-gallon tub, running constantly and never quite catching up, especially after multiple people use it back to back. Manufacturers typically list horsepower and BTU ratings; use the water volume of your specific build to size accordingly, and lean slightly larger rather than slightly smaller if you expect frequent use.
Plan for recovery time. Every plunge raises the water temperature slightly as body heat transfers into the water. A properly sized chiller should be able to bring the tub back to target temperature within a reasonable window between sessions, not hours later.
Consider a heating element too. Some DIYers pair their chiller with a small heating element so the same tub can be used for contrast therapy, alternating between cold and warm without needing two separate setups.
Don't neglect the pump. A chiller only cools water that actually circulates past its sensor and coils. An undersized or poorly placed pump creates temperature stratification, where the top layer of water reads warmer than the bottom, giving you an inconsistent plunge experience even though your thermometer says otherwise.
If you are unsure how commercial-grade systems approach this, it is worth looking at how professional facilities scale their equipment. Forbes Health's overview of cold plunge tubs notes that experts recommend understanding the physiological demands cold water places on the body before committing to a regular practice, which is a useful reminder that the equipment behind a plunge, including its ability to hold a safe, consistent temperature, matters just as much as the routine itself. Reviews of consumer tubs also consistently point to chiller horsepower and cooling speed as the differentiator between budget models and premium ones, with more powerful units reaching target temperatures in hours rather than a full day. Applying that same logic to your own build, sizing generously rather than minimally, will save you a lot of frustration down the line.
Section 3: Water Filtration and Chemistry Keep the System Working
Consistent cold water performance is not just about temperature; it is also about keeping the water clean enough that your equipment does not have to work against buildup, biofilm, or debris. A dirty system is an inefficient system, and it can shorten the lifespan of your chiller and pump.
Run continuous or scheduled filtration. A basic sand or cartridge filter paired with UV sanitation is a common approach for home builds, since it avoids heavy chlorine smells while still controlling bacteria growth.
Test and adjust water chemistry regularly. Even cold water, which naturally slows microbial growth, still needs periodic sanitizer checks and pH balancing to stay safe for repeated use, particularly if multiple people share the same tub.
Change or clean filters on a schedule, not just when the water looks cloudy. Sediment buildup restricts flow, which reduces circulation efficiency and can create the same stratification issues mentioned earlier.
Drain and deep clean periodically. Even with excellent filtration, a full drain and scrub every few weeks (more often with heavy use) prevents scale buildup on chiller coils, which reduces cooling efficiency over time.
This is one area where DIY builders often try to cut corners, but it is also where commercial cold plunge operators put in real testing and standardized water protocols precisely because reliability depends on it. A gym or recovery clinic cannot afford inconsistent water quality across dozens of users a day, and the same logic scales down to a home setup used by a family or a few training partners.
Section 4: Location, Climate, and Long-Term Reliability
The final piece of the puzzle is where and how you place your tub. Even a well-insulated, well-chilled, well-filtered tub can struggle if it is fighting a bad location.
Avoid direct sun exposure. An outdoor tub in full sun will absorb radiant heat all day, undoing much of your insulation work. Shade structures, covers, or simply relocating indoors can make a measurable difference.
Account for seasonal temperature swings. A chiller that keeps up easily in a 60-degree garage in spring may struggle in a 95-degree garage in summer. Size your equipment for your worst-case ambient conditions, not your best-case ones.
Give your equipment airflow. Chillers need to exhaust heat somewhere, and a cramped, poorly ventilated enclosure can cause the unit to overheat and underperform.
Plan for maintenance access. Build your tub so you can actually reach the pump, filter, and chiller connections without disassembling half the structure. Systems that are hard to maintain tend to get neglected, and neglected systems drift out of consistent performance over time.
Cold water immersion has also been gaining attention in health and wellness reporting as more people look for structured, at-home recovery tools rather than relying solely on gyms or spas, a trend you can track through ongoing news coverage of cold plunge and cold water therapy. That growing interest is part of why chiller and filtration technology aimed at home users has improved so much in recent years, and DIY builders benefit directly from those advances when they choose the right components.
Conclusion: Build Once, Plunge for Years
A DIY cold plunge tub can absolutely rival the consistency of a professional setup if you treat it like the engineering project it actually is. Insulate the shell properly, size your chiller to your water volume and ambient conditions, keep circulation and filtration dialed in, and place the tub somewhere that works with your climate instead of against it. Get those four pieces right and you will have a tub that holds its temperature reliably, session after session, without constant troubleshooting.
If you are still in the planning phase, take the time to map out your water volume, your climate, and your expected frequency of use before buying equipment. Sketch your insulation plan before you build the shell, not after. And if you ever find your DIY tub struggling to keep pace no matter what you try, it may be worth comparing your setup against commercial cold plunge tubs on the market to see what components are doing the heavy lifting. A little research now can save you months of frustration later, and it is the difference between a tub you use twice and abandon, and one that becomes a genuine part of your recovery routine for years to come.