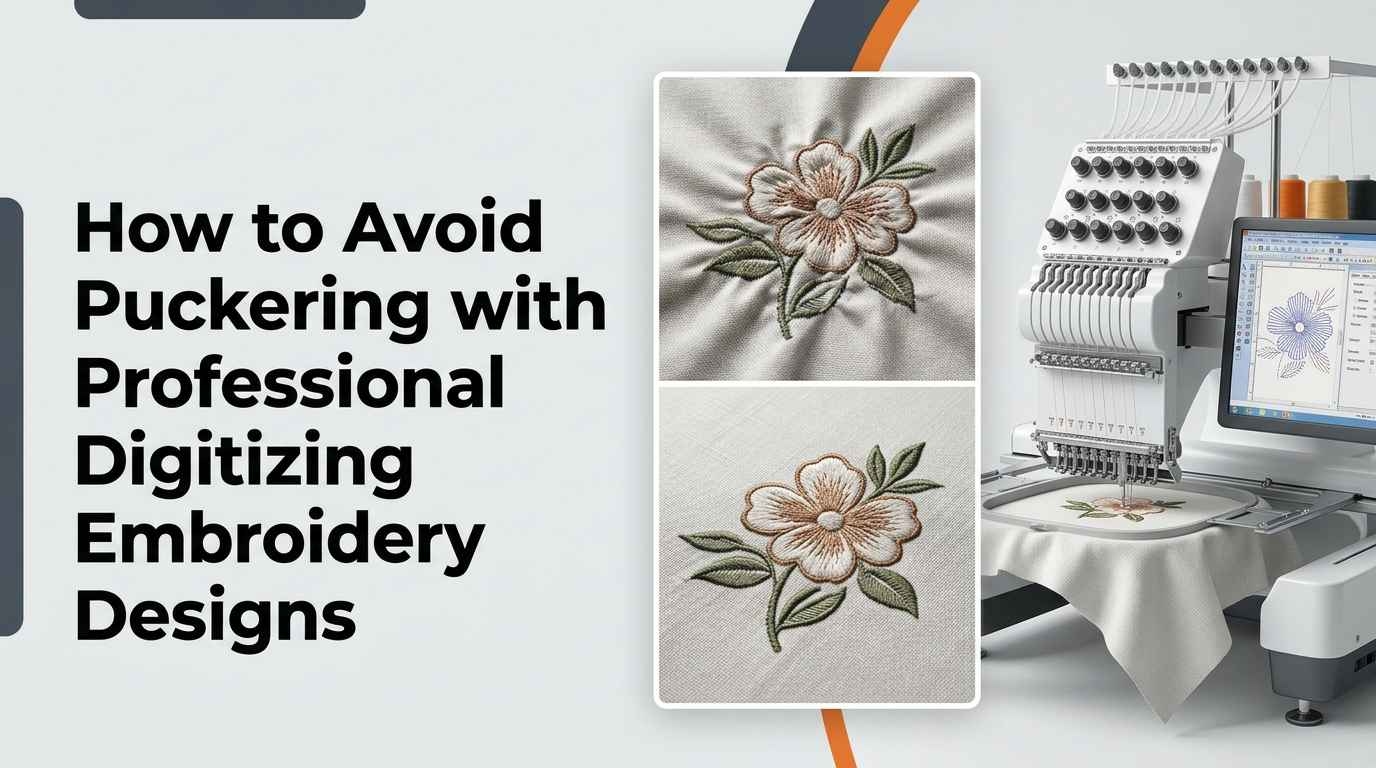
Using professional digitizing embroidery designs can help prevent fabric puckering and improve the appearance of machine embroidery projects. Puckering occurs when the fabric gathers, wrinkles, or becomes distorted around embroidered areas. Poor stitch density, incorrect thread tension, unsuitable stabilizers, and improper digitizing settings can contribute to this common embroidery problem.
Whether you are embroidering corporate logos, personalized clothing, decorative patterns, or promotional products, maintaining a smooth fabric surface is important for achieving quality results.
Even attractive embroidery artwork can produce uneven results when the stitching instructions are unsuitable for the fabric.
Understanding the causes of puckering and applying appropriate digitizing techniques can help reduce production errors, material waste, and unnecessary rework.
This guide explains how to prevent embroidery puckering through professional digitizing, proper fabric preparation, suitable stitch settings, and effective machine embroidery techniques.
What Is Puckering in Machine Embroidery?
Puckering is a fabric distortion problem that causes wrinkles, folds, or gathered areas around an embroidered design.
It can occur during stitching or become noticeable after the fabric is removed from the embroidery hoop.
In some cases, puckering may also appear after washing because the fabric, thread, and stabilizer respond differently to laundering.
The problem is particularly noticeable on lightweight, delicate, and stretchable fabrics.
Although puckering can result from machine settings and fabric preparation, unsuitable embroidery digitizing is another important contributing factor.
A properly prepared embroidery design considers the relationship between stitch coverage, fabric movement, thread tension, and stabilization.
Why Does Fabric Puckering Occur During Embroidery?
Machine embroidery introduces thread and tension into the fabric. When these forces are not properly managed, the material may become distorted.
Several factors can contribute to embroidery puckering.
Excessive Stitch Density
Stitch density refers to how closely embroidery stitches are placed together.
When too many stitches are concentrated in a small area, they can pull and compress the fabric.
This may result in wrinkles around the design and create an unnecessarily stiff embroidered surface.
Incorrect Thread Tension
Excessive upper or bobbin thread tension can contribute to fabric distortion during stitching.
Incorrect tension may also affect stitch formation and thread coverage.
Thread tension should be adjusted according to the machine, thread, fabric, and embroidery requirements.
Unsuitable Stabilizers
Stabilizers provide support to the fabric during embroidery.
Using backing that does not provide sufficient support may allow the fabric to move or gather during stitching.
The appropriate stabilizer depends on the material's weight, construction, and flexibility.
Improper Hooping
Stretching fabric excessively during hooping can cause puckering after the embroidery is completed.
When the fabric is removed from the hoop, it may return toward its original dimensions while the stitched area remains restricted.
The fabric should be securely hooped without unnecessary stretching.
Poor Embroidery Digitizing
Incorrect stitch directions, excessive overlapping stitches, unsuitable underlay, and inefficient sewing sequences can contribute to fabric distortion.
Professional digitizing helps address these issues before the embroidery file is exported.
How Professional Digitizing Embroidery Designs Help Prevent Puckering
Professional embroidery digitizing involves converting artwork into carefully planned stitching instructions.
Instead of simply filling an artwork shape with stitches, a digitizer considers how the material will behave during embroidery.
Suitable digitizing settings can help distribute stitching forces, manage fabric movement, and reduce unnecessary thread buildup.
1. Adjust Stitch Density According to Fabric Type
Different fabrics require different stitch settings.
A design prepared for heavyweight denim may not be suitable for lightweight cotton or stretchable polyester.
Professional digitizing allows stitch spacing to be adjusted according to the intended material.
Increasing stitch density unnecessarily does not automatically improve embroidery quality.
The goal is to achieve sufficient thread coverage while maintaining fabric flexibility and stability.
2. Use Suitable Underlay Stitches
Underlay stitches provide support beneath the visible embroidery design.
They help prepare the fabric for additional stitching and can contribute to more consistent thread coverage.
Different underlay techniques may be suitable for lettering, borders, and larger filled areas.
However, excessive underlay can also contribute to unnecessary stitch buildup.
A digitizer should select the appropriate underlay type and amount according to the fabric and design requirements.
3. Apply Proper Pull Compensation
Embroidery stitches can pull the fabric inward as they are formed.
Pull compensation adjusts the dimensions of individual embroidery objects to account for this effect.
Suitable compensation helps maintain accurate design shapes and reduce unwanted gaps between stitched elements.
However, pull compensation alone cannot eliminate puckering caused by excessive density, poor hooping, or unsuitable stabilization.
It should be used together with other appropriate digitizing settings.
4. Plan Suitable Stitch Directions
Stitch direction influences how embroidery forces are distributed across the fabric.
Large filled areas stitched in the same direction may create concentrated pulling forces.
Changing stitch angles between suitable design sections can help distribute these forces more effectively.
The selected direction should also maintain the intended texture and appearance of the artwork.
5. Reduce Unnecessary Overlapping Stitches
Complex embroidery designs often contain overlapping shapes and colored sections.
When multiple layers of dense stitching occupy the same area, the fabric may become stiff or distorted.
Professional digitizing helps identify hidden stitching that can be reduced without affecting visible coverage.
Carefully controlling overlap also helps maintain accurate alignment between design elements.
6. Organize the Sewing Sequence
The sewing sequence determines the order in which individual design elements are embroidered.
An unsuitable sequence can contribute to fabric movement and alignment problems.
A carefully planned stitching order can help manage fabric distortion as the design develops.
The correct sequence depends on the artwork, stitch directions, underlay, and fabric characteristics.
7. Prepare Designs at Their Intended Size
Significantly reducing an embroidery design without recalculating its stitches may concentrate too many stitches within a smaller area.
This can create stiffness, thread breaks, and puckering.
Preparing the embroidery file at its intended dimensions helps maintain suitable stitch spacing and design proportions.
Separate digitized files may be necessary for significantly different embroidery sizes.
Common Causes of Embroidery Puckering and Their Solutions
Cause | Effect on Fabric | Suggested Solution |
|---|---|---|
Excessive stitch density | Wrinkles and stiffness | Increase stitch spacing where appropriate |
Incorrect thread tension | Fabric gathering | Adjust and test thread tension |
Unsuitable stabilizer | Fabric movement | Select compatible backing |
Overstretched hooping | Distortion after unhooping | Hoop fabric without stretching |
Excessive stitch overlap | Thread buildup | Remove unnecessary hidden stitches |
Poor stitch direction | Uneven pulling forces | Adjust stitch angles |
Incorrect design resizing | Concentrated stitches | Recalculate stitches or redigitize |
Inadequate underlay | Unstable embroidery | Apply suitable underlay |
Excessive machine speed | Potential stitching inconsistencies | Test a suitable operating speed |
These solutions are general recommendations. The correct adjustments depend on the specific embroidery machine, fabric, thread, and digitized design.
How to Prevent Puckering on Different Fabric Types
Different materials respond differently to embroidery stitching. Understanding these characteristics helps digitizers prepare suitable embroidery files.
Lightweight Cotton Fabrics
Lightweight cotton can become distorted when embroidery designs contain excessive stitch density.
Choose lighter designs with controlled stitch coverage and suitable backing.
Avoid stretching the fabric during hooping, as this may cause wrinkles after the embroidery is completed.
Polyester Fabrics
Polyester is commonly used for uniforms, sportswear, and promotional clothing.
Some polyester materials are thin and flexible, making them sensitive to dense embroidery.
Use suitable stabilizers, carefully planned stitch directions, and appropriate thread tension to reduce distortion.
Stretchable Fabrics
Stretchable materials require additional attention because they can move during stitching.
Cut-away stabilizers are often suitable for knitted and stretchable fabrics because they continue supporting the embroidery after production.
Avoid large, densely filled designs that may restrict fabric flexibility.
Denim Fabrics
Denim provides a relatively stable embroidery surface, but puckering can still occur when stitching settings are unsuitable.
Avoid unnecessary stitch buildup and overlapping design elements.
Select appropriate needles and check the fabric thickness before production.
Silk and Delicate Fabrics
Delicate fabrics require careful embroidery preparation because they can be sensitive to needle penetration and stitching tension.
Use lightweight embroidery designs, suitable fine needles, and compatible thread.
Always test the design on a sample before embroidering the final product.
Fleece Fabrics
Fleece has a raised texture that can affect embroidery coverage and visibility.
Suitable underlay, backing, and water-soluble topping can help maintain clear design details.
Avoid adding unnecessary stitch density simply to prevent the thread from sinking into the fabric.
Choosing the Right Stabilizer to Prevent Embroidery Puckering
Stabilizers support the fabric during embroidery and help control unwanted movement.
Choosing the correct stabilizer is an important part of achieving smooth embroidery results.
Cut-Away Stabilizer
Cut-away stabilizer provides continued support after embroidery is completed.
It is commonly used for knitted fabrics, T-shirts, sportswear, and other stretchable materials.
The excess backing is carefully trimmed around the finished design.
Tear-Away Stabilizer
Tear-away stabilizer can be suitable for stable woven fabrics and selected embroidery designs.
It can be removed from the surrounding fabric after stitching.
However, it may not provide sufficient long-term support for dense designs on stretchable materials.
Water-Soluble Stabilizer
Water-soluble stabilizer can be used for certain delicate fabrics, freestanding lace designs, and specialized embroidery applications.
Water-soluble topping is also useful for textured fabrics such as fleece and towels.
Check whether the fabric can tolerate the removal process before using this material.
Adhesive Stabilizer
Adhesive stabilizers can help control fabric movement during certain embroidery projects.
They may be useful for difficult-to-hoop garments and selected delicate materials.
Always confirm that the adhesive is compatible with the fabric and embroidery equipment.
Recommended Stabilizers for Different Fabrics
Fabric Type | Suggested Stabilizer | Main Purpose |
|---|---|---|
Cotton T-shirts | Cut-away | Supports knitted fabric |
Woven cotton | Tear-away or cut-away | Controls fabric movement |
Polyester sportswear | Lightweight cut-away | Supports flexible material |
Denim | Tear-away or cut-away | Supports embroidery stitching |
Fleece | Cut-away with suitable topping | Improves stitch visibility |
Delicate fabrics | Compatible lightweight stabilizer | Reduces distortion |
Stretchable fabrics | Cut-away | Provides continued support |
Towels | Suitable backing and topping | Supports stitches above the fabric texture |
These recommendations are practical starting points. The final stabilizer selection depends on fabric construction, embroidery density, design size, and garment care requirements.
How Proper Hooping Reduces Embroidery Puckering
Correct hooping helps maintain fabric stability throughout the embroidery process.
Begin by selecting a hoop that provides sufficient space for the embroidery design without being unnecessarily large.
Position the fabric and stabilizer smoothly inside the hoop.
Remove visible folds and check that the material is securely positioned.
Avoid pulling or stretching the fabric excessively, especially when working with knitted materials.
The fabric should remain close to its natural dimensions during embroidery.
After completing the design, carefully remove the garment from the hoop and inspect the surrounding material.
If wrinkles appear immediately after unhooping, excessive stretching or unsuitable stabilization may be contributing factors.
How Thread Tension Affects Embroidery Puckering
Thread tension plays an important role in stitch formation and fabric appearance.
When the upper thread or bobbin thread is too tight, the stitches may pull excessively against the fabric.
This can create wrinkles, uneven coverage, and distorted embroidery shapes.
Loose thread tension may also cause problems, including poor stitch formation and visible loops.
Before adjusting tension, check that the machine is threaded correctly and the bobbin is properly installed.
Make small adjustments according to the embroidery machine manufacturer's instructions.
Test each adjustment on a sample of the intended material before continuing production.
Avoid changing several settings at the same time because this can make it difficult to identify the original problem.
Choosing the Right Needle to Reduce Fabric Puckering
Needle selection affects how embroidery stitches are formed within the fabric.
An unsuitable needle may damage fabric fibers, create unnecessary holes, or contribute to poor stitching quality.
Choose a needle according to the fabric type, thread thickness, and machine requirements.
Needles for Lightweight Fabrics
Fine needles may be more suitable for delicate and lightweight materials.
They can help reduce unnecessary fabric displacement when paired with compatible embroidery thread.
Needles for Knitted Fabrics
Suitable ballpoint embroidery needles can help reduce damage to knitted fabric structures.
The correct needle type depends on the specific material and embroidery machine.
Needles for Heavyweight Fabrics
Thicker materials such as denim and canvas may require needles designed for their construction.
However, using an unnecessarily large needle can create visible holes and affect embroidery quality.
Replace damaged or worn needles before starting important embroidery projects.
How Thread Thickness Influences Embroidery Puckering
Embroidery thread thickness affects stitch coverage and the amount of thread placed within a design.
Thicker threads may require wider stitch spacing to prevent excessive buildup.
Finer threads can be useful for small lettering, detailed artwork, and selected delicate fabrics.
However, changing thread thickness without adjusting the embroidery file may create coverage problems.
For example, a design prepared for thicker thread may show visible gaps when stitched with a finer thread using the same settings.
Professional digitizing considers thread thickness alongside stitch density, needle selection, and fabric characteristics.
This helps maintain suitable coverage without placing unnecessary stress on the material.
Best Stitch Types for Reducing Embroidery Puckering
Different embroidery stitches affect fabric movement in different ways.
Selecting suitable stitch types can help control distortion while maintaining the original artwork's appearance.
Satin Stitches
Satin stitches are commonly used for lettering, narrow shapes, and decorative borders.
They can create smooth coverage, but long satin stitches may produce significant pulling forces.
Suitable column widths, underlay, and stitch spacing help manage these effects.
Fill Stitches
Fill stitches provide coverage across larger embroidery areas.
Dense fill stitching can contribute to puckering, especially on lightweight fabrics.
Adjust stitch spacing and direction according to the fabric and design requirements.
Running Stitches
Running stitches are useful for simple outlines, decorative lines, and lightweight embroidery patterns.
They generally require less thread coverage than filled embroidery objects.
Running stitches may be particularly useful when creating designs for delicate materials.
How Embroidery Design Size Affects Fabric Puckering
The size of an embroidery design influences how stitches are distributed across the material.
Large designs with extensive filled areas may create significant pulling forces.
Small designs can also cause puckering when too many stitches are concentrated within limited space.
Reducing a design's dimensions without recalculating its stitches may increase stitch density.
For example, a detailed logo prepared for a jacket back may become excessively dense when reduced to fit a shirt pocket.
Professional digitizing helps prepare embroidery files according to their intended dimensions.
Separate embroidery files may be necessary when producing significantly different sizes of the same artwork.
How to Prevent Puckering in Multi-Color Embroidery Designs
Multi-color embroidery designs often contain overlapping shapes, decorative borders, and several layers of stitching.
These features require careful preparation to reduce unnecessary thread buildup.
Start by reviewing the relationship between individual color sections.
Remove redundant hidden stitching where it is not required for coverage or support.
Plan the sewing sequence to control fabric movement and maintain accurate alignment.
Adjust stitch density and direction according to the needs of each embroidery object.
Carefully planned color transitions can help prevent excessive stitching where different colored areas meet.
Test the complete design because distortion may become noticeable only after several color sections have been embroidered.
How to Prevent Puckering in Large Embroidery Designs
Large embroidery designs require careful management of fabric movement and stitch coverage.
Divide extensive filled areas into suitable embroidery sections when appropriate.
Use stitch directions that complement the artwork while managing concentrated pulling forces.
Select a stabilizer that provides sufficient support throughout the entire embroidery area.
Avoid excessive underlay and overlapping stitches.
Where the artwork permits, incorporate open spaces or lighter stitching techniques to reduce unnecessary thread coverage.
Always check that the embroidery design fits within the machine's supported stitching area.
Test large designs on the actual fabric before beginning commercial production.
Can Embroidery Machine Speed Cause Puckering?
Embroidery machine speed can influence stitching performance, particularly when working with delicate materials or complex designs.
Higher speeds may contribute to fabric movement or inconsistent stitching when the machine setup is unsuitable.
Reducing the operating speed may help in certain situations.
However, machine speed alone cannot correct excessive stitch density, unsuitable backing, or poor digitizing.
Select an operating speed according to the machine manufacturer's recommendations and the requirements of the embroidery project.
Evaluate the finished sample before increasing production speed.
How to Fix Puckering After Embroidery Is Completed
Some minor embroidery wrinkles may be improved after stitching, depending on their cause and the fabric type.
Begin by examining the embroidered area to determine whether the distortion is temporary or permanent.
Allow the fabric to relax after removing it from the hoop.
Where permitted by the garment care instructions, gentle pressing from the reverse side may help reduce minor surface wrinkles.
Use a protective cloth and an appropriate temperature for the material.
Avoid applying excessive heat or pressure directly to raised embroidery.
Severe puckering caused by excessive stitch density or permanent fabric damage may not be fully correctable.
In these cases, adjusting the embroidery file and producing a new sample may be necessary.
Prevention is generally more practical than attempting to repair severely distorted embroidery.
How to Test Professional Digitizing Embroidery Designs Before Production
Test stitching helps identify potential puckering problems before valuable garments are embroidered.
Use a sample of the same fabric intended for the final project.
Select the planned embroidery thread, needle, stabilizer, and machine settings.
Stitch the complete design and inspect the embroidered area both inside and outside the hoop.
Check for fabric wrinkles, distorted shapes, excessive stiffness, thread buildup, uneven borders, and unwanted gaps.
For washable clothing, evaluate the embroidery after laundering a sample according to its care instructions.
If puckering occurs, adjust one variable at a time and repeat the test.
This process helps identify whether the issue comes from digitizing, fabric preparation, or machine settings.
Common Mistakes to Avoid When Preventing Embroidery Puckering
Several avoidable mistakes can contribute to poor embroidery results.
Using the Same Digitizing Settings for Every Fabric
Different fabrics require different embroidery preparation techniques.
A design suitable for denim may create puckering on lightweight sportswear.
Prepare the embroidery file according to the intended material.
Adding Too Many Stitches
Increasing stitch count unnecessarily can make embroidery stiff and contribute to fabric distortion.
Focus on suitable thread coverage rather than maximizing stitch count.
Stretching Fabric During Hooping
Excessive stretching can cause the material to gather around the design after it is removed from the hoop.
Hoop the fabric securely while maintaining its natural dimensions.
Using Excessive Underlay
Underlay provides valuable support, but too many foundation stitches can increase thread buildup.
Use only the amount required for the specific embroidery design.
Ignoring Thread and Needle Compatibility
An unsuitable needle and thread combination can affect stitch formation and fabric condition.
Choose compatible materials according to the embroidery machine and project requirements.
Resizing Designs Without Recalculating Stitches
Significant resizing may create unsuitable stitch density and distorted design elements.
Use appropriate embroidery editing software or redigitize the artwork when necessary.
Skipping Test Stitching
A digital embroidery preview cannot fully demonstrate how the design will behave on actual fabric.
Always evaluate a physical sample before starting larger production orders.
How Professional Digitizing Reduces Material Waste
Poor embroidery quality can result in damaged garments, wasted thread, additional machine time, and repeated production work.
Professional digitizing helps address potential stitching problems during the preparation stage.
Suitable stitch density, carefully planned underlay, and efficient sewing sequences can reduce unnecessary stitching.
Testing designs before full production also helps identify issues before they affect multiple garments.
For commercial embroidery businesses, maintaining approved embroidery files and documented machine settings can support consistent production.
However, changes in fabric, thread, garment construction, or machine setup may require additional testing.
How to Choose a Professional Digitizing Service to Avoid Puckering
Selecting a suitable embroidery digitizing service is important for reducing avoidable fabric distortion.
Look for a digitizer who considers fabric characteristics rather than applying identical settings to every embroidery design.
Provide clear original artwork and explain the intended embroidery size, fabric type, thread requirements, and garment placement.
Ask whether the service provides revisions when test stitching reveals technical problems.
Review actual embroidered samples whenever possible.
A suitable digitizing service should consider stitch density, underlay, pull compensation, stitch direction, and sewing sequence when preparing embroidery files.
Clear communication between the embroidery operator and digitizer can help identify potential problems before production.
Conclusion
Avoiding puckering with professional digitizing embroidery designs requires careful attention to stitch density, fabric characteristics, underlay, pull compensation, and sewing sequences. Suitable stabilizers, correct thread tension, compatible needles, and proper hooping techniques are equally important for maintaining smooth embroidery results.
Preparing each embroidery design according to its intended fabric and dimensions can help reduce unnecessary thread buildup, fabric distortion, and production errors. Test stitching provides an opportunity to identify and correct problems before embroidering the final garment.
Whether you are creating corporate logos, personalized clothing, decorative patterns, or commercial embroidery products, carefully prepared embroidery files can support cleaner and more consistent results. With custom embroidery digitizing services from Zdigitizing.net businesses and embroidery enthusiasts can prepare designs according to their specific fabric and stitching requirements.
Frequently Asked Questions About Embroidery Puckering
What Is the Main Cause of Embroidery Puckering?
Excessive stitch density, incorrect thread tension, unsuitable stabilizers, and improper hooping are common causes. The exact reason depends on the embroidery design, fabric, and machine setup.
Can Professional Digitizing Prevent Puckering?
Professional digitizing can help reduce puckering through suitable stitch density, underlay, stitch direction, and sewing sequences. However, correct machine settings and fabric preparation are also necessary.
What Is the Best Stabilizer to Prevent Embroidery Puckering?
Cut-away stabilizer is often suitable for knitted and stretchable fabrics, while tear-away stabilizer may work well on stable woven materials. The correct choice depends on the fabric and design.
Why Does My Fabric Pucker After Removing the Embroidery Hoop?
The fabric may have been stretched excessively during hooping. Unsuitable stitch density, thread tension, or inadequate stabilization may also contribute to the problem.
Can Excessive Stitch Density Cause Puckering?
Yes. Too many stitches concentrated within a small area can compress the fabric and create wrinkles, stiffness, and distorted embroidery shapes.
Does Pull Compensation Prevent Embroidery Puckering?
Pull compensation helps account for changes in embroidered shapes caused by stitching forces. It can improve design alignment but cannot independently resolve every puckering problem.
How Can I Prevent Puckering on T-Shirts?
Use suitable cut-away stabilization, controlled stitch density, compatible thread and needles, and proper hooping techniques. Avoid stretching the material during preparation.
Can Embroidery Puckering Be Removed by Ironing?
Gentle pressing may reduce certain minor wrinkles when permitted by the garment care instructions. Severe puckering caused by unsuitable stitching may not be fully correctable.
Does Changing Embroidery Machine Speed Reduce Puckering?
Reducing machine speed may help when fabric movement or stitching inconsistencies contribute to puckering. However, underlying digitizing and stabilization problems must also be addressed.
Why Is Test Stitching Important for Preventing Puckering?
Test stitching allows embroidery operators to identify fabric distortion, excessive density, unsuitable tension, and other problems before beginning commercial production.