Flat vs 3D Puff: Choosing the Right Digitizing for Structured Caps

Standing in front of a stitch out sample, a client once asked me why their bold logo looked flat and lifeless on a hat when it popped so well on a t-shirt. The answer had nothing to do with the design itself. It came down to digitizing choice, and on structured caps, that choice usually comes to one thing: flat or 3D puff digitizing.
Both methods can turn a logo into a clean embroidered piece, but they behave completely differently once foam, panel curves, and stitch density get involved. Picking the wrong one on a curved front panel can mean puckering, uneven foam edges, or text that turns into a blob. Working with reliable cap embroidery digitizing services means understanding which method actually fits your design before a single stitch gets sewn, and that's exactly what we're breaking down here.
What Flat Embroidery Digitizing Means for Cap Logos?
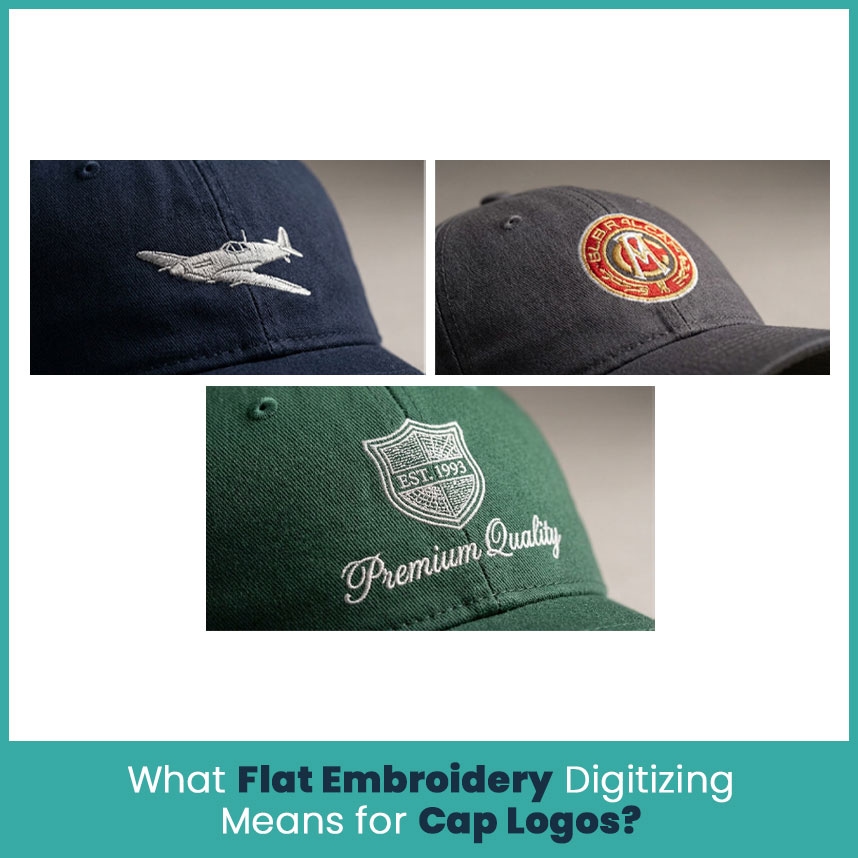
When most people picture embroidery, this is what they're actually picturing. Flat digitizing lays the thread right on the fabric, no foam underneath, so the design stays close to the cap instead of rising off it.
This method works well because it keeps fine detail intact. Small letters, thin outlines, and detailed artwork hold their shape without the bulk that foam adds. Pretty sure anyone who's dealt with a logo that has small text knows how quickly foam can turn crisp letters into a mushy mess.
How Flat Digitizing Handles Stitch Density on a Curved Panel?
Now here's the thing about cap panels, they're not flat. That front panel curves outward from the center seam, and a digitizer who knows what they're doing adjusts stitch density and pull compensation as the design moves away from that seam line. Skip this step and stitches near the edges start to gap or bunch up. Foam free designs have nowhere to hide those little inconsistencies either, so it shows fast.
Here's what actually helps on a curved panel:
Slightly tighter density near the seam, gradually loosening toward the edges.
Column widths kept narrow enough to bend naturally with the panel curve.
Underlay stitches that anchor the design before the top stitching begins.
Digitizing done directly on a cap shaped hoop template, not a flat mockup.
Best Design Types for Flat Digitizing (Text, Fine Detail, Small Logos)
Flat digitizing shines on:
Small text under half an inch tall
Logos with fine linework or thin serifs
Multi color designs with tight color separation
Corporate logos that need to stay sharp and professional looking
Basically, if the design has detail that needs to stay readable at a small size, flat is almost always the safer route.
What 3D Puff Digitizing Means for Structured Caps
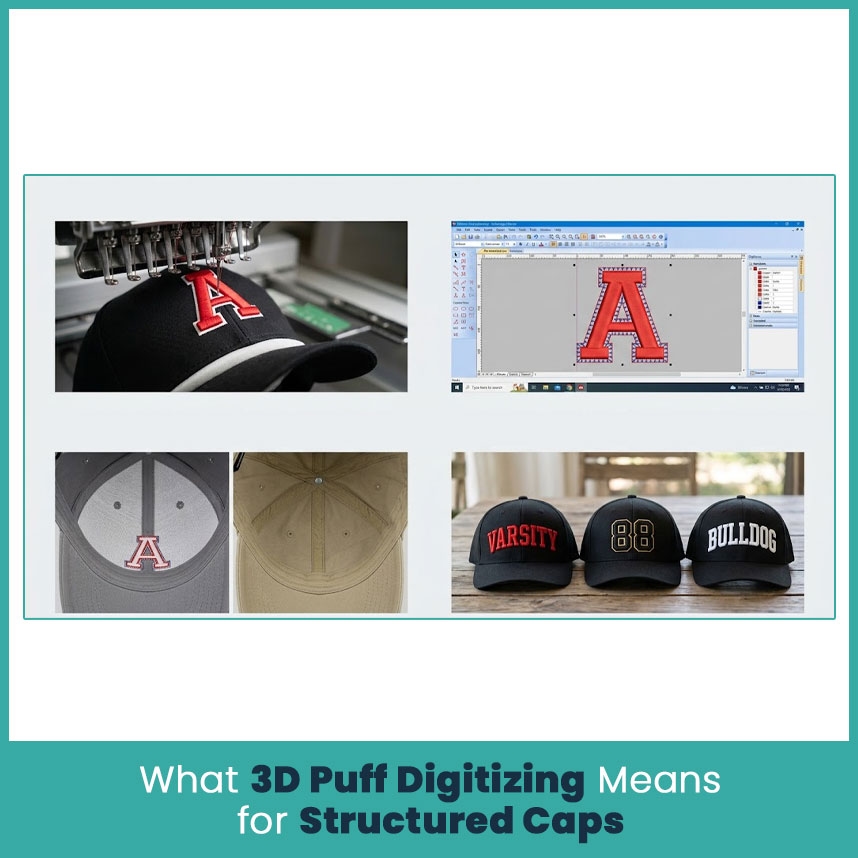
3D puff works differently. A layer of foam goes underneath the stitching first, and as the thread compresses it, you get that raised, dimensional look. Think varsity caps, streetwear brands, bold athletic logos, anything meant to grab attention from a few feet away.
But once you dig into what puff actually changes inside the file, it's easy to see why you can't just take a design that worked as flat embroidery and expect it to convert the same way.
How Foam Placement Changes the Digitizing File?
The digitizer has to build in extra stitch paths that account for the foam's thickness. Satin columns get widened, and the file needs cutting lines or stops built in so the foam gets trimmed away cleanly around the design edges. Skip this step and the foam edges fray or show through the final stitching.
A few things change in the file itself:
Wider column widths to fully cover the foam surface.
Additional tie down stitches to secure foam edges before the top layer.
Zigzag or satin stitch adjustments to compress foam evenly instead of leaving lumps.
Digitized stop points where foam needs manual trimming mid-stitch.
Why Puff Height Depends on the Cap's Front Panel Structure
Structured caps have a stiffer buckram lining built into the front panel, and that gives the foam something firm to press against while it stitches. Unstructured or low profile caps don't have that backing, so the foam sits softer and flattens out quicker with wear. On a structured cap, standard 3mm or 4mm foam usually holds up fine, though going thicker on a small panel can actually cause the crown to pull or warp a bit during stitching.
Best Design Types for 3D Puff (Bold Letters, Thick Outlines)
3D puff works best on:
Bold block letters, especially numbers and initials.
Thick outlined logos without fine interior detail.
Mascot style designs with large solid shapes.
Designs meant to stand out from several feet away.
Fine detail and small text just don't converted well once foam gets involved, the compression eats up anything under a certain size.
Flat vs 3D Puff: Key Differences That Affect the Final Look
Factor | Flat Digitizing | 3D Puff Digitizing |
Stitch count | Lower, closer to standard density | Higher, due to wider columns and tie-downs |
File complexity | Straightforward, fewer stop points | More complex, needs foam trim points built in |
Underlay | Light to moderate underlay | Heavier underlay to anchor foam securely |
Curvature handling | Adjusts density along the panel curve | Needs extra compensation since foam resists bending |
Best panel fit | Works on any panel size | Needs enough panel height for foam depth |
Wear and tear | Holds up evenly over time | Foam edges can flatten gradually with heavy wash |
Stitch Count and File Complexity
3D puff files run noticeably heavier on stitch count because of the extra tie-down layers and wider satin columns needed to cover foam completely. A logo that runs 8000 stitches as flat digitizing might climb to 12000 or more once foam and trim points get added.
Underlay Requirements for Each Method
Underlay acts like a foundation. Flat designs need just enough to stabilize the fabric and prevent shifting. Puff designs need considerably more, since the underlay has to hold the foam in place before the top stitching compresses it down.
How Each Method Reacts to Cap Curvature and Seams?
Flat digitizing bends naturally with panel curvature since there's no rigid foam layer resisting the shape. 3D puff pushes back against tight curves because foam doesn't compress evenly near seams. That's why puff logos usually sit centered on the flattest part of the panel, away from the curved edges near the button.
Which One Fits Your Design: A Simple Decision Guide

When Flat Digitizing Is the Better Choice
The design has small text or fine detail.
Budget matters and lower stitch counts keep costs down.
The logo needs to sit close to the fabric for a subtle look.
The cap has a shallow front panel that can't fit foam depth.
When 3D Puff Is the Better Choice
The design uses bold letters or thick shapes.
The brand wants a raised, eye catching look.
The cap has a structured front panel with enough height.
The logo will be viewed from a distance, like on sports gear.
Mixed Designs, Combining Flat and Puff Elements on One Cap
Some of the best looking caps actually combine both. A bold puffed letter paired with flat detail work around it, like a mascot outline in puff with fine facial detail digitized flat, gives depth without losing the small details. It takes a digitizer who knows how to transition between the two stitch types cleanly so the seam between flat and puff areas doesn't look choppy.
Common Mistakes That Ruin Structured Cap Embroidery

Wrong Foam Density for Small Text
Using standard foam thickness on small lettering is one of the most common mistakes out there. The foam can't compress small enough to keep letters legible, and the text ends up looking like a blurry lump instead of readable type.
Skipping Push-Pull Compensation on Curved Panels
Every stitch pulls the fabric slightly as it forms. On a curved panel, that pull compounds unevenly if the digitizer doesn't compensate for it, leaving designs that look stretched on one side and compressed on the other once they come off the machine.
Ignoring Panel Seams When Placing the Design
Placing a design too close to the center seam or side panel seams causes uneven stitching, since the machine has to stitch over a bump instead of a flat surface. Good placement keeps the bulk of the design centered on the flattest part of the panel.
How to Get a Digitizing File That Matches Your Cap's Needs
Choosing the right embroidery digitizing service really comes down to one thing, finding someone who asks about panel structure, foam depth, and design placement before they even start the file. Not someone who just runs your logo through auto digitizing software and calls it done. That upfront conversation is what separates a cap that still looks sharp after fifty washes from one that puckers after the first.
By the way, working with experienced embroidery digitizing companies in the USA puts you in front of digitizers who already know the cap-specific quirks, buckram backing, panel curvature, and how foam behaves differently on structured versus unstructured styles. That kind of hands on experience makes a real difference when a design needs tweaking for a specific cap style instead of getting forced into a generic flat template.
FAQs
Is 3D puff digitizing more expensive than flat digitizing?
Yes, Higher stitch counts and extra foam trimming steps add to both digitizing and stitch out costs compared to flat designs.
Can I combine flat and 3D puff on the same cap design?
Absolutely. Combo designs are common, especially for mascots or logos that need both bold shapes and fine detail in one piece.
Does 3D puff work on low profile caps, or only structured ones?
It works best on structured caps with a buckram backed front panel. Low profile caps can still use it, but the foam won't hold its shape as long without that firm backing.
What file format works best for structured cap embroidery?
DST is the standard format most commercial embroidery machines read, whether the design is flat or puff digitized.
Author Bio
Matthew Davis
Senior Embroidery Digitizer
I'm Matthew Davis, a skilled embroidery digitizer with more than 15 years of practical experience. I specialize in logo digitizing, 3D puff embroidery designs, applique digitizing, custom embroidery digitizing, and working with difficult fabrics. Over the years, I have worked with different fashion brands and production teams worldwide. I always share simple tips and useful techniques to help both beginners and businesses improve their embroidery work.