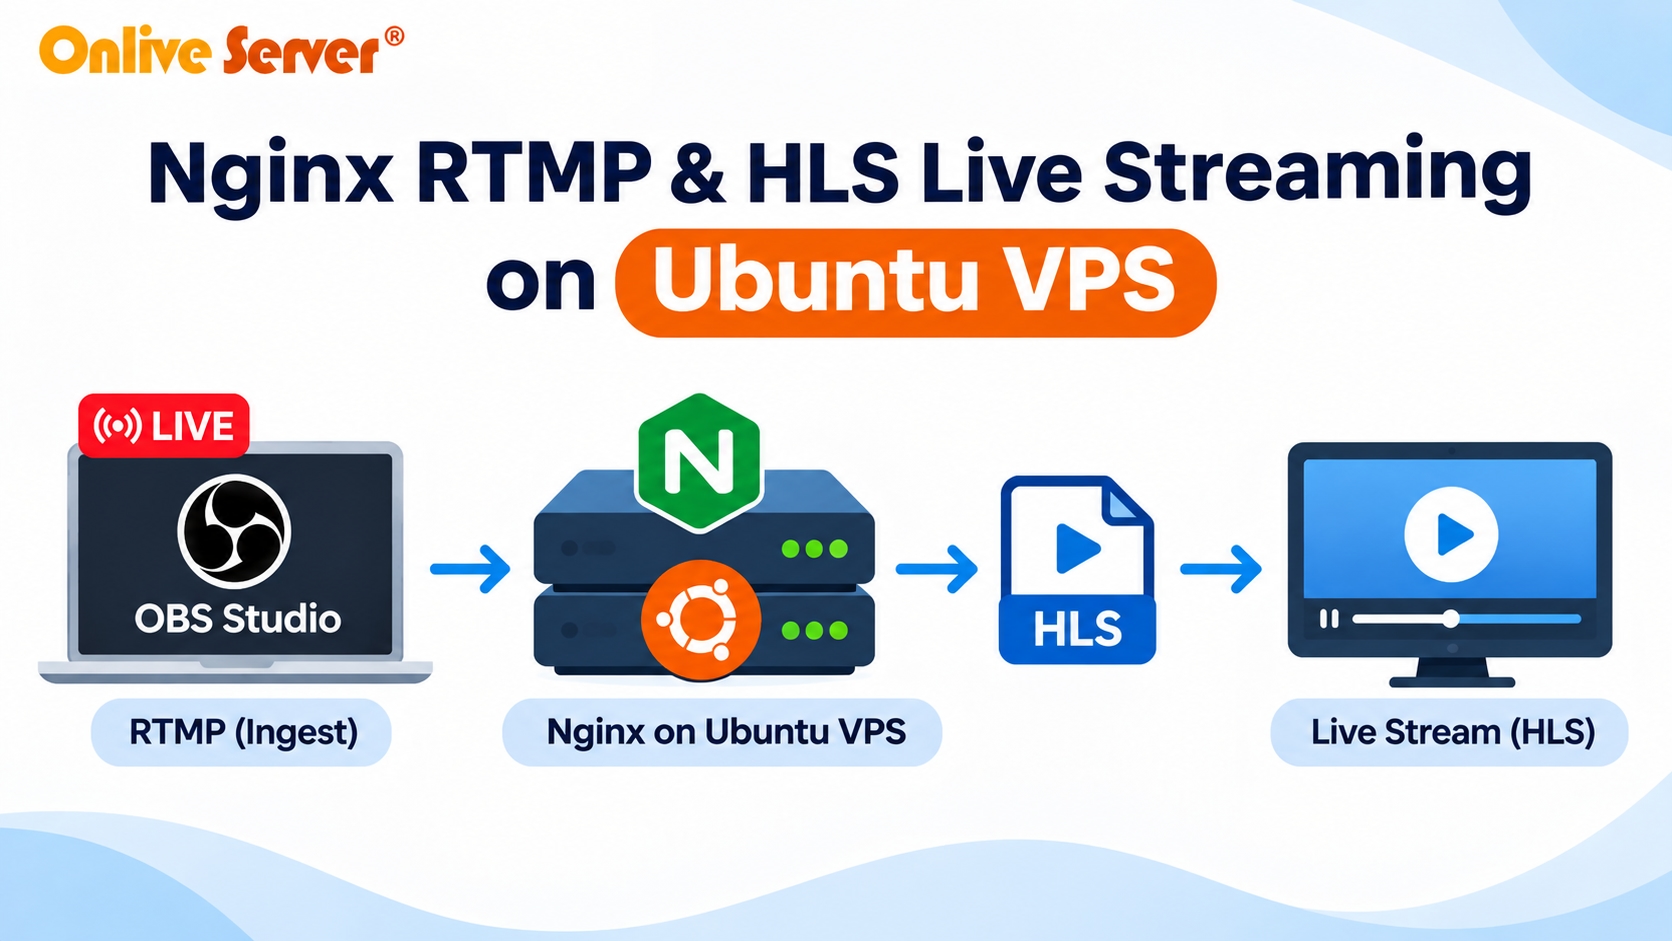
If you want to broadcast a live event from OBS Studio to your own website, you don't necessarily need a commercial streaming platform. An Ubuntu VPS can receive your live video, prepare it for browser playback, and deliver it to viewers using Nginx.
The setup uses two main technologies: RTMP for sending video from your broadcasting software to the server, and HLS for delivering that video to web browsers.
In this guide, you'll build a private Nginx RTMP and HLS streaming pipeline on Ubuntu 24.04 LTS. You'll also connect OBS Studio, create a browser video player, and configure basic security.
The goal is a working live streaming server without relying on an external video hosting platform.
How the RTMP and HLS Streaming Pipeline Works
Before installing anything, it helps to understand how video moves through the system.
The basic streaming process looks like this:
OBS Studio → RTMP Server → HLS Segments → Nginx HTTPS → Web Video Player
OBS Studio captures your camera, screen, and microphone. It encodes the video and sends it to your VPS using RTMP.
Nginx receives that stream through the RTMP module.
The module then packages the incoming video into smaller HLS segments and creates an .m3u8 playlist.
Viewers open a web page that reads the playlist and plays the video.
This process is called transmuxing when the server changes the delivery format without re-encoding the video.
Transmuxing generally requires much less CPU processing than converting the video into another codec or resolution.
What You Need Before Starting
For a small test environment, prepare the following:
Ubuntu 24.04 LTS VPS
A user account with sudo access
Nginx and its RTMP module
OBS Studio on your computer
A domain pointing to the VPS
Access to your firewall settings
Enough upload and outbound bandwidth for your stream
A VPS with 2GB RAM and two virtual CPU cores can be a reasonable starting point for testing a single incoming stream without server-side video transcoding.
The actual number of viewers depends on the video bitrate, network speed, traffic allowance, and server resources.
For this tutorial, we'll use stream.example.com as an example domain. Replace it with your own domain before running the configuration.
Step 1: Install Nginx, RTMP Module, and FFmpeg
Connect to your VPS through SSH.
Update the package list:
sudo apt update
sudo apt upgrade -y
Install Nginx, the Ubuntu RTMP module package, and FFmpeg:
sudo apt install -y nginx libnginx-mod-rtmp ffmpegThe libnginx-mod-rtmp package provides the RTMP functionality for Ubuntu's packaged Nginx installation.
It lets Nginx receive RTMP streams and create HLS output without requiring a manual source compilation.
Check the installation:
nginx -v
ffmpeg -version
Enable Nginx:
sudo systemctl enable --now nginxCheck whether it is running:
sudo systemctl status nginxIf Nginx is active, continue to the next step.
Step 2: Create a Directory for HLS Files
HLS works by creating short media files and a playlist that tells the video player where to find those files.
Create the directory:
sudo mkdir -p /var/www/stream/hlsGive Nginx permission to write the HLS segments:
sudo chown -R www-data:www-data /var/www/streamSet the directory permissions:
sudo chmod -R 755 /var/www/streamThe RTMP module will use this directory to store temporary HLS files.
The directory must be writable by the Nginx worker process. If your installation runs under a different service account, adjust ownership accordingly.
Step 3: Configure Nginx RTMP Ingest
Open the main Nginx configuration file:
sudo nano /etc/nginx/nginx.confAdd the following block outside the existing http {} block. It should be at the main configuration level.
rtmp {
    server {
        listen 1935;
        chunk_size 4096;

        application live {
            live on;
            record off;

            hls on;
            hls_path /var/www/stream/hls;
            hls_fragment 4s;
            hls_playlist_length 20s;
            hls_cleanup on;

            allow publish 127.0.0.1;
            allow publish YOUR_PUBLIC_IP;
            deny publish all;

            allow play all;
        }
    }
}
Replace YOUR_PUBLIC_IP with the public IP address from which OBS Studio will broadcast. If you broadcast from the same server, the localhost rule already permits it.
Make sure you remove the placeholder before testing.
This configuration performs several tasks.
listen 1935 opens the standard RTMP ingest port.
live on allows live video publishing.
record off prevents the module from automatically saving an RTMP recording.
hls on enables HLS playlist and media segment generation.
hls_path specifies where the generated files will be written.
hls_fragment 4s sets a target duration of four seconds for each segment.
hls_playlist_length 20s controls the approximate duration represented by the live playlist.
hls_cleanup on removes old segments that are no longer needed.
The publish rules restrict which IP addresses can send a stream. They are important because an open RTMP publishing endpoint can be misused.
Save the file.
Check for configuration errors:
sudo nginx -tIf the configuration test succeeds, reload Nginx:
sudo systemctl reload nginxStep 4: Configure HLS Delivery Through Nginx
Your RTMP server can now receive video, but browsers need an HTTP or HTTPS endpoint to read the HLS files.
Create a new Nginx website configuration:
sudo nano /etc/nginx/sites-available/streamingAdd:
server {
    listen 80;
    server_name stream.example.com;

    location /hls/ {
        alias /var/www/stream/hls/;

        types {
            application/vnd.apple.mpegurl m3u8;
            video/mp2t ts;
        }

        add_header Cache-Control "no-cache" always;
        add_header Access-Control-Allow-Origin "*" always;
    }
}
Replace stream.example.com with your domain.
The alias directive connects the public /hls/ URL to the directory where Nginx creates the stream files.
The MIME types identify the HLS playlist and video segments.
The CORS header allows a browser player hosted on another domain to request the stream. If you want playback only from a particular website, replace * with that website's origin.
Enable the configuration:
sudo ln -s /etc/nginx/sites-available/streaming \
/etc/nginx/sites-enabled/streaming
Test the configuration:
sudo nginx -tReload Nginx:
sudo systemctl reload nginxThis provides the HTTP delivery endpoint. HTTPS will be configured next.
Step 5: Configure the Firewall and HTTPS
Your server needs HTTP and HTTPS access for viewers.
Allow these ports:
sudo ufw allow OpenSSH
sudo ufw allow 80/tcp
sudo ufw allow 443/tcp
For RTMP publishing, allow only your broadcaster's IP address:
sudo ufw allow from YOUR_PUBLIC_IP to any port 1935 proto tcpReplace YOUR_PUBLIC_IP with your actual public IP address.
Check the rules:
sudo ufw statusIf UFW is not enabled, confirm that SSH access is allowed before enabling it:
sudo ufw enableIf your VPS provider also uses a cloud firewall, configure matching rules there.
Next, install Certbot:
sudo apt install -y certbot python3-certbot-nginxMake sure your domain points to the VPS and is reachable on port 80.
Request an HTTPS certificate:
sudo certbot --nginx -d stream.example.comReplace the example domain with your real domain.
Follow the prompts to complete certificate setup.
Your HLS endpoint will then be available through HTTPS.
This secures video delivery to viewers. It does not encrypt the standard RTMP connection from OBS to Nginx. For sensitive streams, protect ingest with a VPN or a properly configured encrypted ingest method.
Step 6: Connect OBS Studio to Your VPS
Open OBS Studio on your computer.
Go to:
Settings → Stream
Choose a custom streaming server.
Enter the following details.
Service: Custom
Server:
rtmp://stream.example.com:1935/liveStream Key:
event-demo-2026Use your VPS domain or IP address for the server.
Choose a long, unpredictable stream key for actual use.
Remember that the RTMP configuration shown earlier uses an IP allowlist. A stream key alone is not authentication in this setup.
Next, open the Output settings in OBS.
For broad HLS compatibility, configure H.264 video encoding and AAC audio.
You can start with a moderate video bitrate suitable for your available upload bandwidth.
Set a keyframe interval of two seconds when your chosen encoder supports it.
This helps the HLS server create playback segments around appropriate keyframes.
Click Start Streaming.
OBS should connect to the VPS and begin sending video.
Step 7: Check the Generated HLS Playlist
After starting your stream, connect to your VPS and check the HLS directory:
ls -lh /var/www/stream/hls/You should see files similar to:
event-demo-2026.m3u8
event-demo-2026-0.ts
event-demo-2026-1.ts
Actual filenames may differ.
The .m3u8 file is the playlist. The .ts files contain the video segments.
Test the playlist URL:
https://stream.example.com/hls/event-demo-2026.m3u8You can inspect the HTTP response using:
curl -I https://stream.example.com/hls/event-demo-2026.m3u8A successful response while OBS is broadcasting indicates that the playlist is accessible.
If the playlist returns 404, confirm that OBS is connected and that the RTMP module is writing files to the expected directory.
Step 8: Add an HTML5 Video Player
Now you need a video player that can read an HLS playlist.
Video.js is one option for browser-based playback.
Create an HTML file for your website:
<!DOCTYPE html>
<html lang="en">
<head>
  <meta charset="UTF-8">
  <meta name="viewport"
        content="width=device-width, initial-scale=1">

  <title>Private Live Stream</title>

  <link
    href="https://vjs.zencdn.net/8.23.3/video-js.css"
    rel="stylesheet">
</head>

<body>
  <h1>Live Video Stream</h1>

  <video
    id="live-player"
    class="video-js vjs-default-skin"
    controls
    autoplay
    muted
    playsinline
    width="800"
    height="450">

    <source
      src="https://stream.example.com/hls/event-demo-2026.m3u8"
      type="application/x-mpegURL">
  </video>

  <script
    src="https://vjs.zencdn.net/8.23.3/video.min.js">
  </script>

  <script>
    videojs('live-player', {
      liveui: true,
      fluid: true
    });
  </script>
</body>
</html>
Replace the example HLS address with your actual stream URL.
Open this HTML page through your website while OBS is streaming.
The player should request the HLS playlist and begin playback.
The example uses a public Video.js CDN for the player assets. You can host those files yourself if you want to avoid depending on a third-party CDN.
Step 9: Understand FFmpeg and Video Transmuxing
An important part of this setup is the difference between transmuxing and transcoding.
With transmuxing, the server changes the video packaging without changing the encoded audio and video streams.
For example, compatible H.264 and AAC content received through RTMP can be packaged into HLS segments.
That keeps server-side processing relatively low.
Transcoding is different. It converts the video or audio into another format, resolution, or bitrate.
FFmpeg can perform this conversion, but it also increases CPU usage.
For a small Ubuntu VPS, the simplest approach is to encode the video in OBS before sending it to Nginx.
Use FFmpeg on the server only when you actually need additional processing.
The tutorial's Nginx configuration does not automatically create separate 1080p, 720p, and 480p video qualities.
Producing those variants requires an additional encoding pipeline and more processing resources.
Step 10: Troubleshoot Common Streaming Problems
OBS Cannot Connect to the Server
Check that Nginx is running:
sudo systemctl status nginxConfirm that the RTMP listener is active:
sudo ss -lntp | grep 1935If OBS still cannot connect, check the firewall and your broadcaster IP allowlist.
HLS Playlist Is Missing
Check whether OBS is actively broadcasting.
Inspect the output directory:
ls -la /var/www/stream/hls/If no files appear, review the RTMP configuration and directory permissions.
Check recent Nginx errors:
sudo tail -n 50 /var/log/nginx/error.logVideo Keeps Buffering
Buffering can happen when the viewer's internet connection cannot download segments quickly enough.
It can also be caused by insufficient outbound bandwidth from the VPS.
Try reducing the bitrate in OBS and testing again.
Shorter HLS segments may reduce part of the delay, but they do not guarantee low-latency playback. Standard HLS usually buffers several segments.
Video Plays Without Audio
Check the audio codec in OBS.
AAC is commonly used for HLS streaming and works with many browser players.
Also confirm that the browser is not muting playback.
Securing Your Private Streaming Pipeline
A self-hosted streaming server gives you control over video delivery, but it also makes you responsible for access protection.
Do not leave the RTMP publishing endpoint open to every IP address.
Use a firewall allowlist or a private VPN for broadcasting. For changing broadcaster IP addresses, an authenticated publishing callback is another option.
Keep Ubuntu and Nginx packages updated.
Use HTTPS for web playback.
If the video is intended only for invited viewers, protect the HLS playlist and segment URLs with appropriate authentication or signed access controls.
An unpredictable stream key does not make a publicly accessible HLS URL private.
You should also monitor traffic usage. For example, a single 4 Mbps stream viewed by 20 people creates roughly 80 Mbps of video traffic, excluding overhead.
For related VPS configuration and streaming infrastructure guidance, see setting up a video streaming server on budget VPS.
Frequently Asked Questions
How do I set up an Nginx RTMP server on Ubuntu VPS?
Install Nginx and the RTMP module, create an rtmp application block in the main Nginx configuration, allow the broadcaster's IP address, and connect OBS Studio using the RTMP server address.
How do I convert RTMP to HLS on a Linux server?
Enable hls on inside the Nginx RTMP application and set an hls_path directory. The module can package compatible incoming video into HLS playlists and segments without full re-encoding.
Do I need FFmpeg for every live stream?
No. When OBS sends compatible H.264 video and AAC audio, the Nginx RTMP module can package that stream into HLS. FFmpeg is useful when video conversion or additional processing is needed.
Can a budget VPS handle live video streaming?
Yes, especially when the VPS mainly receives and distributes already-encoded video. The available network bandwidth, viewer count, and bitrate usually matter more than CPU-intensive encoding in this setup.
Can I use this streaming server without YouTube or Twitch?
Yes. Your VPS can receive live video and serve it directly to your own website. You will still need to manage server resources, security, bandwidth, and viewer access.
Conclusion
Building a private Nginx RTMP and HLS streaming server on Ubuntu VPS is a practical way to host your own live broadcasts.
OBS Studio handles the video encoding, Nginx receives the stream, and HLS makes playback possible through a web player.
Start with one stream, verify the configuration, and monitor bandwidth before increasing the number of viewers. Add extra encoding services or more powerful infrastructure only when your streaming requirements demand them.