He was a Heap boy, she was a Stack girl, but they lived in different spaces. Або Java Memory Structure в деталях
В цій статти я детально роповісти про Java Memory Structure.

Теми цього довгочиту:
Java та ще 3 темиЗалишили оплесків 10
В цій статти я детально роповісти про Java Memory Structure.
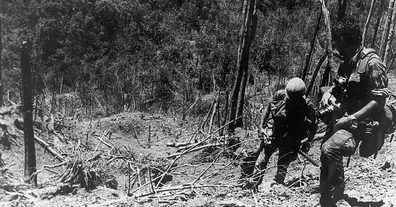
Багато підрозділів мають славетну бойову історію. У цій статті я пропоную розглянути, як минуле та військові традиції формування можуть зберігатися й передаватися з покоління в покоління.
Конституція Німеччини проголошує: „Die Würde des Menschen ist unantastbar. — гідність людини непорушна; держава зобов’язана її поважати та захищати . Що таке гідність?
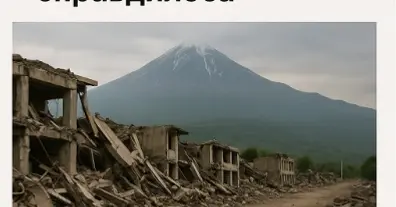
30 липня 2025 року у регіоні Камчатки стався руйнівний землетрус магнітудою 8.8. Ця подія вразила не лише Далекий Схід, але й викликала хвилю занепокоєння в науковій спільноті по всьому світу.
Невеличкий допис про травматичну культуру, наслідки виховання у цій культурі та про те, як цьому запобігти. Написана штучним інтелектом.
Теорія така: всі ці гоніння на «АЛЛАТРА» в росії, всі ці суди, штрафи, блокування — це, мовляв, фейк! Просто гігантське шоу, щоб «прикрити» їх, а насправді через АЛЛАТРА вони хочуть внедритися в Україну і проштовхувати проросійську пропаганду.
В українській літературі останніх десятиріч щораз більш помітні впливи західно-европейської історіософії та філософії. З цього погляду до наймаркантніших постатей належить безперечно М. Хвильовий, чолова постать нашого повоєнного письменства.

Learn how the IVG 2400 vape offers up to 2400 puffs, four built-in pods, and a premium vaping experience. Ideal for users who want variety and convenience.

Куди вигідно вкласти гроші у 2025 році: огляд актуальних напрямів інвестування — нерухомість, фондовий ринок, криптовалюта, бізнес, P2P-кредитування.

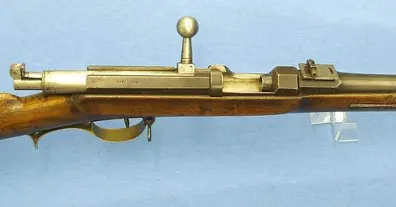
Голчаста гвинтівка Дрейзе є важливою віхою у історії вогнепальної зброї, оскільки саме у ній було вперше успішно використано унітарний патрон та ковзний затвор, що в подальшому стали невід’ємними елементами конструкції більшості гвинтівок останньої третини XIX

Ви всього в пару кроків від персональної стрічки і повного функціоналу Друкарні
Військовослужбовець (піхота)
Контент-кріейтор, Копірайтер


